Flowing from Aseprite to Unity: My workflow to send assets to Unity
- tools
- integration
- aseprite
- gamedev
Hello everyone,
Over the past six years or more, I’ve relied on Aseprite for the bulk of my creative projects. Throughout this time, one consistent challenge has been the transition from creating sprites in Aseprite to integrating them into game engines.
I’ve continually found ways to optimize my workflow, employing various tricks and scripts to mitigate these challenges. With the recent introduction of the Aseprite importer plugin and the refinement of my own scripts and techniques, I’ve managed to develop a highly efficient process.
This flow virtually eliminates the overhead traditionally associated with iterating on artwork, allowing me to focus more on the creative process itself.
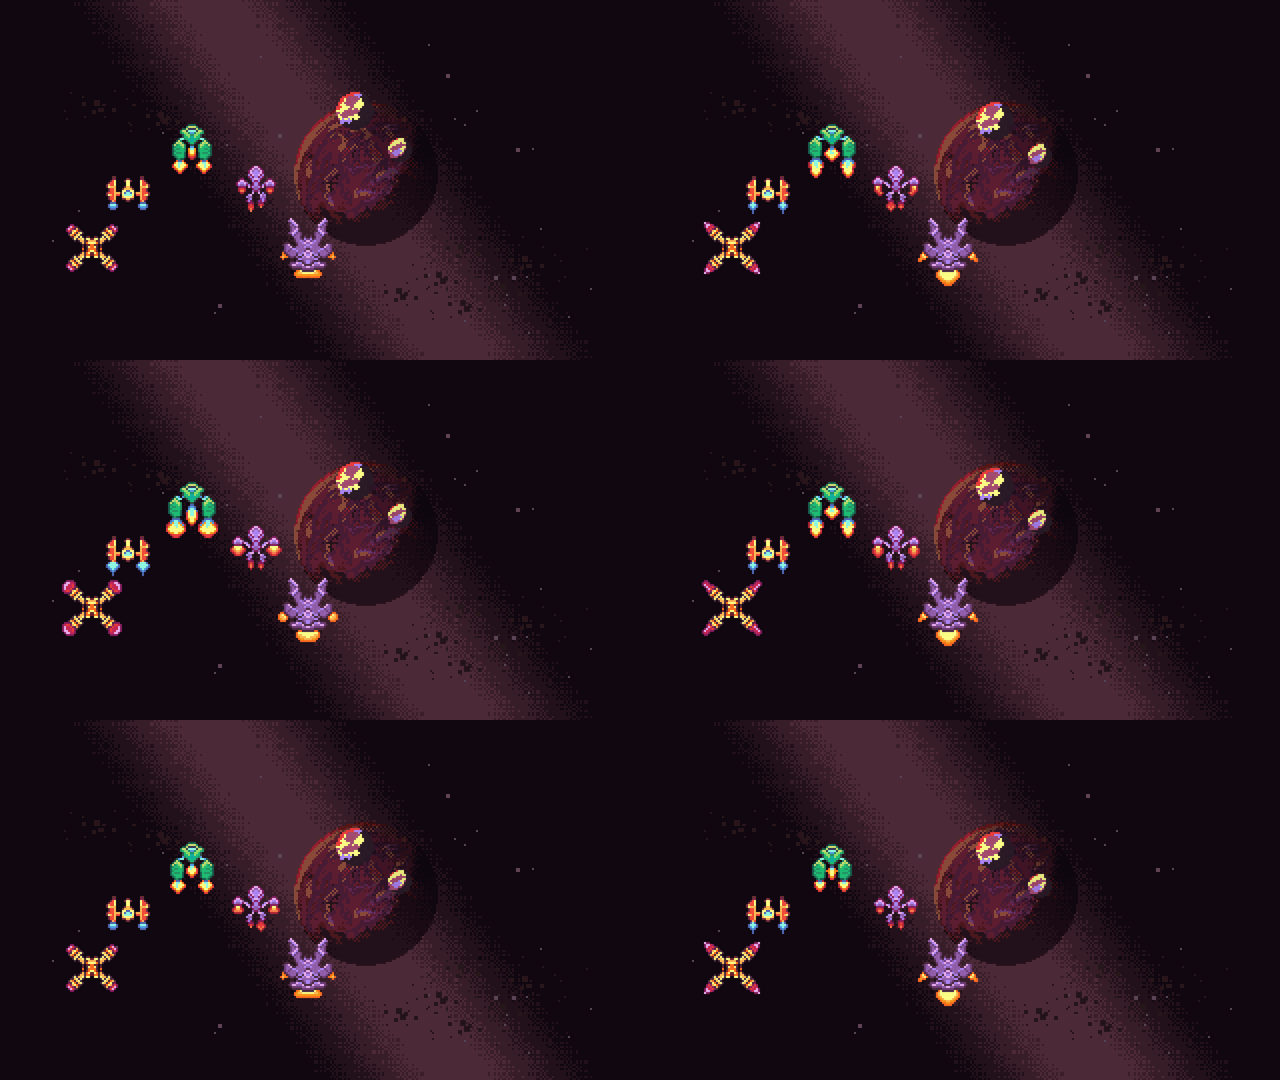
For context, I’m currently developing VoidBite, a top-down shooter featuring spaceships and bullet hell elements. During development, I encountered significant challenges when transferring sprites to Unity. Despite finding an art style I quite liked, all the sprites and elements tended to blend together on the game screen, which detracted from the visual “coolness” of the game.
To address this, I adopted a highly iterative approach to creating the artwork:
- Generate a base sprite
- Integrate it into Unity (initially using sprite atlas)
- Check its visual impact
- Refine
- Step 2 again — a lot of times
With these challenges in mind, I devised a workflow aimed at facilitating rapid iterations and implementing generic animation behaviors.
Here’s how the process unfolds:
Using the plugin Aseprite Import Unity (Initial Workflow)
This plugin is an absolute delight to work with, simplifying the bulk process of importing assets with remarkable efficiency. It eliminates the need to manually export Aseprite files into PNGs and streamlines the creation of animation tags and sprites. Its customizable nature ensures it can be tailored to your specific requirements.
If my game solely focused on player animations, this initial step would be the only thing I needed.
First of all, include the plugin in your unity project. Once you’ve inserted one aseprite file to unity, the plugin automatically creates the components by the settings.
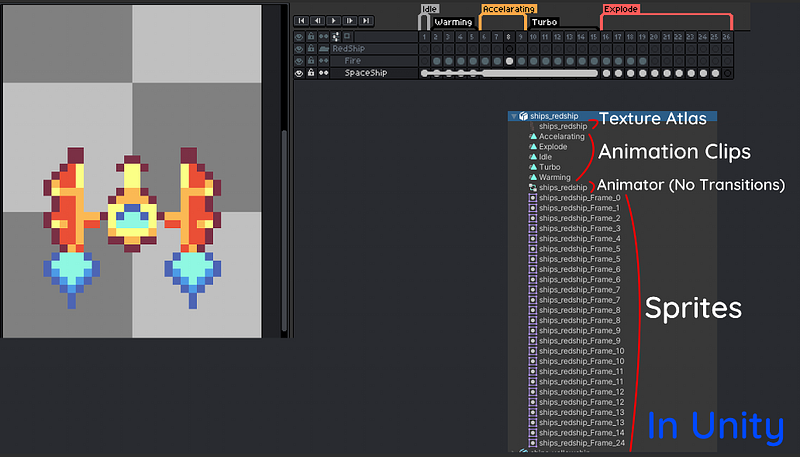
The next step involves configuring the importer settings to your needs. In my case:
- Pixels Per Unit set to
32to match my sprite size - Layer Import set to
Merge Frame— allows the plugin to automatically merge layers within the same frame - Pivot Alignment set to
Center— essential for games involving sprite rotations to ensure smooth rotation around the center - Filter Mode set to
Bilinear— for sprites used with my custom shader, to reduce jitteriness and artifacts
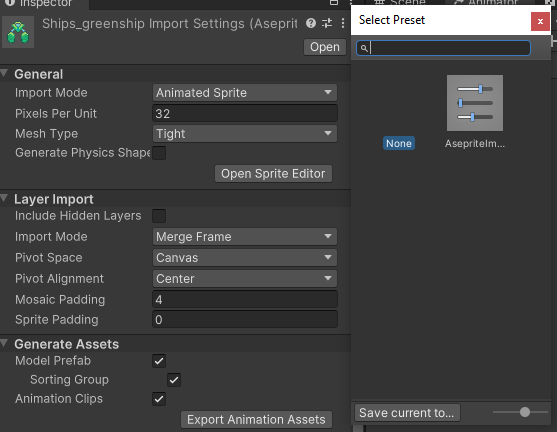
Following this setup, I create a Unity preset with these configurations to apply them uniformly across all sprites, eliminating the need to repeat the process for each file.
The last step involves creating transitions between the generated clips:
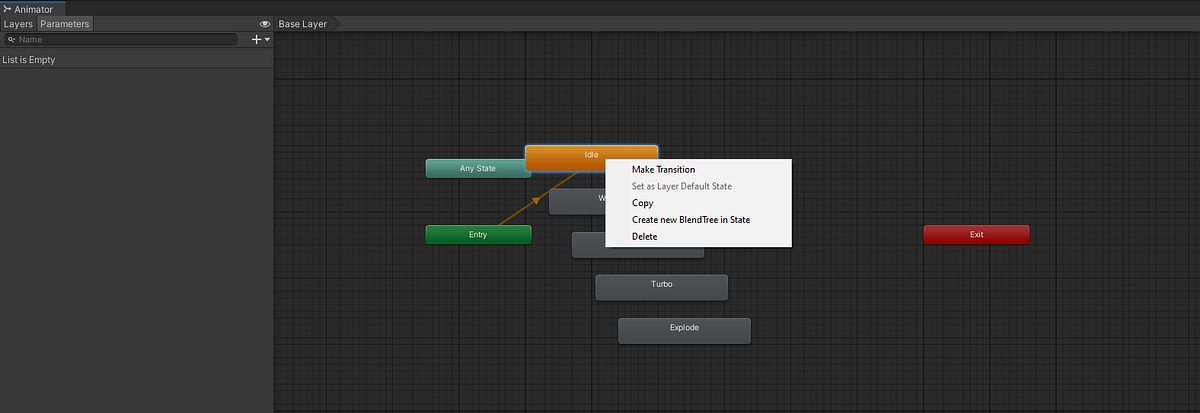
With these steps, we’ve established a simple streamlined workflow. Any changes made in Aseprite are automatically synchronized with Unity, eliminating the need for manual intervention. It’s a seamless process that keeps your development pipeline fast.
That already improved the process considerably — but for my use case, it still wasn’t enough.
Creating transitions for all my sprites was still slow, and most sprites follow a default behavior:
- Ships: Idle → Warming → Accelerating → Turbo → Explode
- Bullets and other elements: Idle → Slide → Hit
With numerous ships and elements, creating transitions quickly became overwhelming. So we arrived at the second iteration:
Override Animator to the Rescue (Second Iteration)
We now have a bunch of Aseprite files containing different sprites, but they all use the same tags and require identical animations. Unity provides a feature called Animator Override Controller, which lets you take an existing sprite animator as a template and create overrides for subsequent sprites.
With that in mind, the steps are:
- Export the animation controller of one element using the Aseprite plugin
- Create all the transition logic within that exported animation controller
- Create Animator Override Controllers for each remaining object, pointing at the template, then drag-and-drop the animation clips generated by the plugin
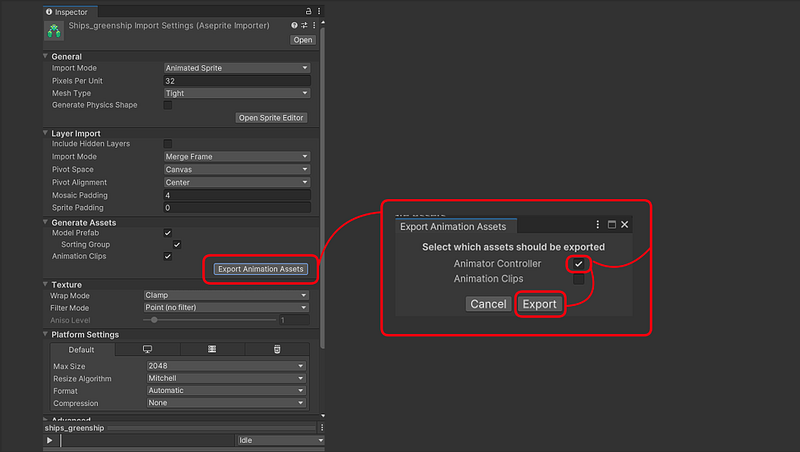
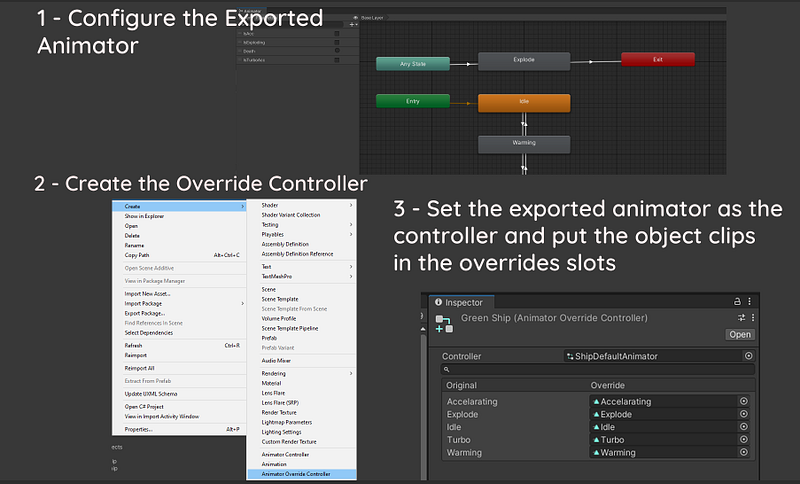
With these new steps, our workflow became streamlined even with multiple sprites. We now only need to create the Animator Override Controller and drag-and-drop the clips. Pretty neat, right?
Not for me. I needed more.
One issue I encountered is the necessity of saving sprites in multiple files. While not a dealbreaker, it can be tedious — particularly for consistency. I enjoy working with numerous sprites simultaneously and drawing inspiration from one to another.
Another reason for wanting to keep multiple sprites in one file is layered animations. For example, a layer of cracks in a spaceship when it sustains damage. With the current solution, the cracks need to live in a separate file. This becomes problematic when modifying the spaceship’s shape: now you must navigate through several files to adjust the crack shape, without even having the spaceship in the same file for reference.
To address these challenges, we arrived at the third iteration:
Aseprite Scripts Saving the Day (Third Iteration)
Arguably one of the most sorely missed features of Aseprite, its scripting capability is both robust and intuitive. Aseprite scripts can do everything, and they’re really easy to set up.
In this iteration I devised a single Aseprite script tailored precisely to the needs of my project. The script iterates through layer groups within an Aseprite file and generates separate .ase files for each group, carrying the respective tags and sprite data.
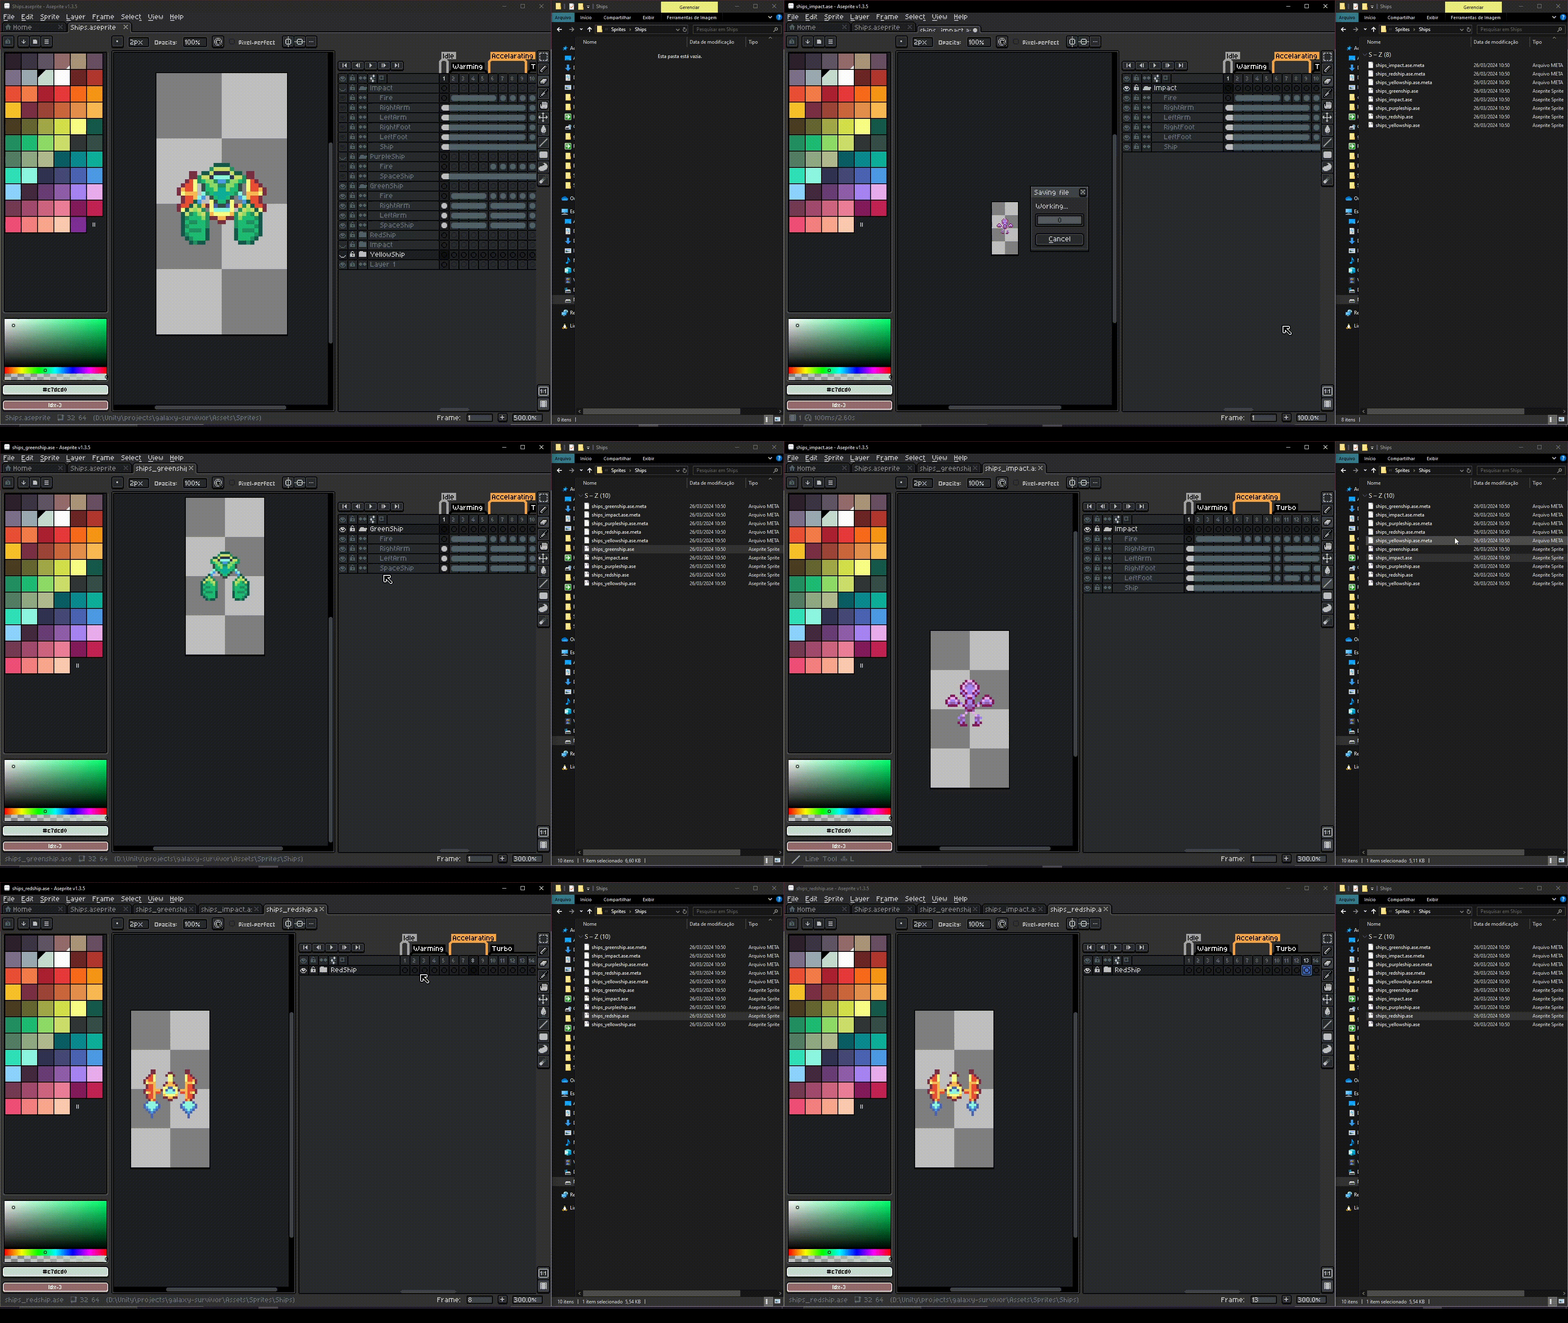
-- Sample of the script
function exportLayers(sprite, rootLayer, pathPrefix, pathSufix)

  for i, layer in ipairs(rootLayer.layers) do
     if (layer.isEditable) then

        local layerName = string.lower(layer.name)
        local filenameBase = pathPrefix .. layerName
        local ending = ".ase"

        if not layer.isGroup then
           layer.isVisible = true
           sprite:saveCopyAs(filenameBase .. ending)
           layer.isVisible = false
        else
-- ...You can find the script in the original Medium post linked above. I may go into more depth on how it works if someone finds it useful.
Final Thoughts
With this workflow in place, navigating an iterative asset creation process is quite manageable — particularly in scenarios where time is short or when collaborating with others.
Different projects come with their own unique set of requirements. In another project, for example, I made adjustments to the Lua exporter script to upscale sprites so they could be used with Unity’s default Bilinear Filter.
Beyond the workflow itself, there are various additional steps I take to circumvent specific challenges: employing a custom shader to eliminate pixel artifacts, implementing sprite mipmaps to address rendered resolution issues, and more. Those deserve their own posts.
To all who’ve journeyed through this post, thank you. I hope you found it insightful. Questions and feedback are welcome.
Valeu!